
How to Apply Autobody Seam Sealer Correctly

A welded patch can look perfect from the outside and still fail from the inside out. Water works its way into lap joints, floor seams, trunk gutters, and wheelhouse overlaps long before corrosion becomes visible. Autobody seam sealer closes those paths, helping protect repairs and factory-style joints before primer, paint, and undercoating go on.
This is not a product to smear over questionable metal or use as a substitute for proper welding. It is the finishing step that makes clean metalwork more durable. Applied correctly, seam sealer keeps moisture, road spray, dust, and fumes out of places that paint alone cannot reliably protect.
What Autobody Seam Sealer Actually Does
Vehicle bodies are made from overlapping panels, pinch welds, spot-welded flanges, and seams that move slightly with heat, vibration, and road use. Even a well-primed joint can have a fine gap that allows moisture to enter. Seam sealer bridges that gap while remaining flexible enough to handle normal panel movement.
The best use of seam sealer is on welded or factory-type seams that have already been repaired, cleaned, and coated with the appropriate primer. Common locations include trunk seams, roof gutters, firewall seams, wheel tubs, rocker panel joints, floor pan overlaps, cowl areas, door skins, and inner fender seams.
It also matters where you do not use it. Do not use seam sealer to fill deep dents, cover active rust, replace missing metal, or hide a poor weld. Thick, unsupported applications can crack, trap moisture, or create a repair that looks good only until the first season of driving.
Choose the Right Type of Autobody Seam Sealer
The right material depends on where the seam is located, how it will be painted, and the texture you need to match. Most restoration work falls into three useful categories.
Brushable seam sealer
Brushable products work well when you need to recreate a heavy factory-brushed appearance on floor pans, trunk seams, firewall joints, and wheelhouses. They are useful for irregular seams where a smooth bead would look out of place. A stiff acid brush can help create the original directional brush marks found on many older vehicles.
Brushable sealer is usually the better choice for broad seams, but it can get messy fast. Mask areas that must stay clean, and avoid building it up in thick ridges. Several controlled passes are better than one heavy application.
Cartridge seam sealer
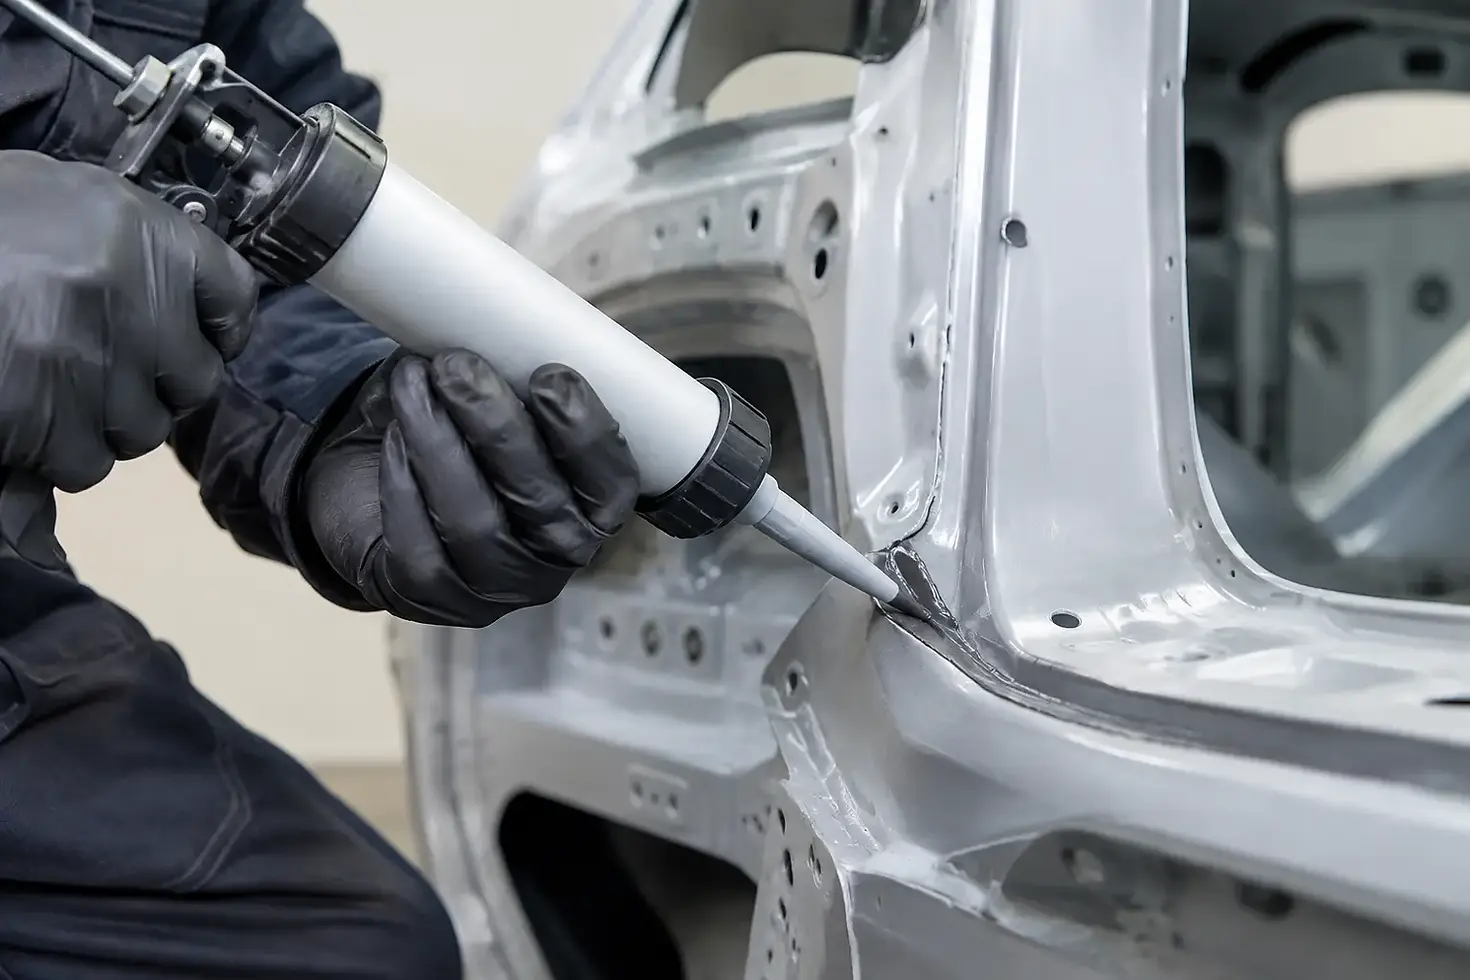
Cartridge products are applied with a standard caulking gun and are the practical choice for most restoration garages. They provide good bead control on lap joints, flanges, trunk channels, and panel overlaps. A cartridge also makes it easier to lay down a consistent bead before tooling it with a gloved finger, spreader, or seam-sealer brush.
For a factory-looking repair, cut the nozzle smaller than you think you need. You can always add material, but removing a wide, uneven bead from a tight seam is wasted time.
Two-part seam sealer
Two-part products cure through a chemical reaction rather than exposure to air. They are often chosen for professional collision repair and areas where a fast, dependable cure is needed. They generally require a dedicated applicator and mixing tips, so they cost more up front than a single-component cartridge.
That extra expense can make sense on late-model repairs, structural-style panel work, or jobs where turnaround time matters. For a hobby restoration, a quality paintable cartridge sealer is often the more practical fit unless the repair procedure calls for a two-part product.
Surface Prep Decides Whether the Repair Lasts
Seam sealer is only as reliable as the surface beneath it. Start by removing rust, loose old sealer, oil, sanding residue, and weld spatter. A wire wheel, abrasive disc, scraper, and solvent cleaner all have a role, but the goal is simple: sound metal and a clean, stable coating system.
After welding, inspect both sides of the repair whenever access allows. A floor patch may look sealed from inside the cabin while the underside has unprotected weld seams exposed to tire spray. Treating both sides is often what separates a lasting repair from one that needs to be redone later.
For bare steel, apply the primer recommended for the coating system you are using. Epoxy primer is commonly used because it provides a strong corrosion-resistant foundation and gives seam sealer a stable surface to bond to. Let the primer flash or cure according to its technical instructions before applying sealer. If it has cured beyond its recoat window, scuff it as required so the sealer has proper mechanical adhesion.
Avoid applying seam sealer directly over self-etching primer unless the product instructions specifically allow it. Not every primer and sealer chemistry is compatible. When materials are mixed without checking their intended use, lifting, soft adhesion, or paint failure can show up later.
How to Apply Seam Sealer Like a Clean Shop Repair
Dry-fit your nozzle angle and practice on cardboard before going near the vehicle. The goal is not a giant bead. It is full contact along the joint, with enough material to cover the seam and feather smoothly onto both panels.
Apply a steady bead with consistent gun pressure, then tool it before a skin forms. A gloved finger lightly dampened with the appropriate solvent can work for short seams, but use only what the product manufacturer permits. For wider seams, a plastic spreader or dedicated brush gives better control and reduces finger marks.
Match the vehicle's original appearance where it will be visible. Some factory seams are narrow and nearly flat. Others have obvious brush strokes or a thick, uneven texture. Study untouched areas on the vehicle before sealing the repaired section. A clean repair that does not match the surrounding factory texture can stand out after paint.
Use masking tape when sharp edges matter, particularly around trunk gutters, firewall details, and painted interior panels. Pull the tape while the sealer is still workable. Waiting until it fully cures can tear the edge and leave a rough line.
Paint, Undercoat, and Cure Time
Most automotive seam sealers are paintable, but "paintable" does not mean paint immediately. Follow the product's flash, cure, and recoat instructions. Painting too early can trap solvents and cause bubbling, shrinkage, or a soft finish. Waiting too long without scuffing can create an adhesion problem just as easily.
On exposed exterior or underbody seams, seam sealer is normally followed by primer, color or chassis coating, and undercoating where appropriate. In a wheelhouse or on the underside of a floor pan, the protection works as a system: primer keeps corrosion from starting at the metal, seam sealer blocks the joint, and topcoats protect the repair from abrasion and UV exposure.
For enclosed areas such as rocker panels, doors, and boxed frame sections, seam sealer on the outside of a flange is only part of the job. Once coatings have cured, use a cavity wax or internal corrosion protection product where access permits. Water entering from the hidden side can defeat an otherwise excellent exterior repair.
Common Mistakes That Create Future Rust
The most common failure is sealing over rust scale or contaminated metal. The sealer may stick at first, but corrosion continues underneath and eventually pushes the coating away. Another frequent problem is using a huge bead to hide a rough joint. Thick material may sag, cure unevenly, and look out of place after paint.
Poor drainage is another issue. Do not seal factory drain holes, body plugs, or channels designed to let water escape. A sealed joint is good. A sealed water trap is not. Before coating a trunk, cowl, door, or rocker area, verify where water is supposed to travel and leave those paths open.
Finally, do not overlook temperature. Cold panels and cold cartridges are harder to apply cleanly, while excessive heat can shorten working time. Bring materials into the recommended temperature range before starting, especially when working in an unheated garage.
A quality seam sealer is inexpensive insurance compared with cutting out a rusted repair later. Build the repair from clean metal outward, match the sealer to the job, and take the time to reproduce the original seam profile. That is the kind of detail that keeps a restoration looking right long after it leaves the garage.


Comments